

How To Draw Detailed Dragon Eggs Not Hatched
What would dragon eggs look similar? As a fan of both Harry Potter and A Game of Thrones, I have been pondering this question for a while. Last Easter my son voiced the question as well, and over the course of a curt family give-and-take, we decided that they must exist encrusted with jewels and precious stones from dragon's treasury. Of class, next we needed to make dragon eggs, just in example a baby dragon might hatch out of i!
UPDATE: Also check our mermaid eggs – with a pace-by-step video tutorial!

This mail service contains Amazon Affiliate links for your convenience.
We're very fond of dragons hither. We've made dragon puppets, a dragon cartoon prompt and colouring page, and at present we decided to make… a dragon egg!
If y'all want to make dragon eggs, you'll need:
- aluminum foil
- air-dry dirt (for art projects, my favourite air-dry clay is La Doll Premier; for quick crafts with kids, Crayola Air Dry clay is a good economic culling)
- liquid watercolours/nutrient colouring
- acrylic beads, jewels and stones; seashells, beach glass and rocks; annihilation else that might embellish a dragon'south egg
Watch the Video
After, we fabricated mermaid eggs, using the same technique, and that time I took a video of the process. Check this tutorial to find information technology!
How to Make Fantasy Eggs

Step 1: Gear up Dirt
You can buy coloured air-dry clay or you can get a big tub of white/natural clay and stain it with watercolours or food colouring. That's what nosotros did. For a more than even terminate, mix a few drops of paint into the dirt before starting to sculpt. On the picture above y'all can come across how the dirt looked before and afterwards staining. Withal, you lot can too sculpt with whatever colour y'all've got and paint the surface once the clay is dry out. Nosotros added more color at that phase, too.
Step ii: Brand the Base
Roll aluminum foil into an egg form to create a base. In that location are two reasons to get-go with the base of operations: it saves clay, and, virtually importantly, information technology creates a solid core. Without one, it'll be difficult to keep the egg from shifting its form when you kickoff pushing beads and stones into it. Also, if you want to make a surprise egg and allow the receiver "hatch it" to find a miniature toy dragon or something like inside, wrap the present into aluminum foil at this betoken.
Step 3: Cover the Base with Clay
Start building the dirt layer. It needs to exist at least one/two″ deep, and so that you have plenty depth to push beads into the clay. Roll information technology into a circle, then wrap the aluminum egg in it. Encompass the opening last.
Air-dry out clay unremarkably takes virtually 24 hours to dry, more or less depending on ambient humidity and how thick the layer is, so you don't need to hurry. But if you start feeling similar it's getting besides dry, you can add water to the surface. If you demand to interruption, put your piece of work and whatever leftover clay into a zip-lock bag with a few drops of water. You tin also use a brush with water for smoothing the surface when doing final touches.
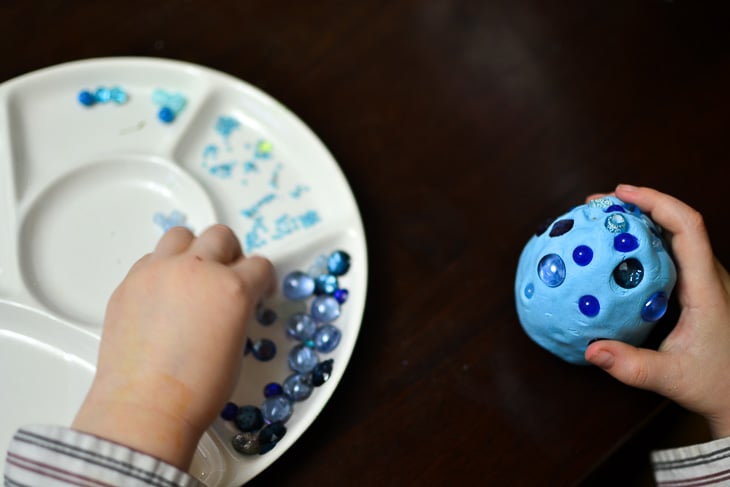
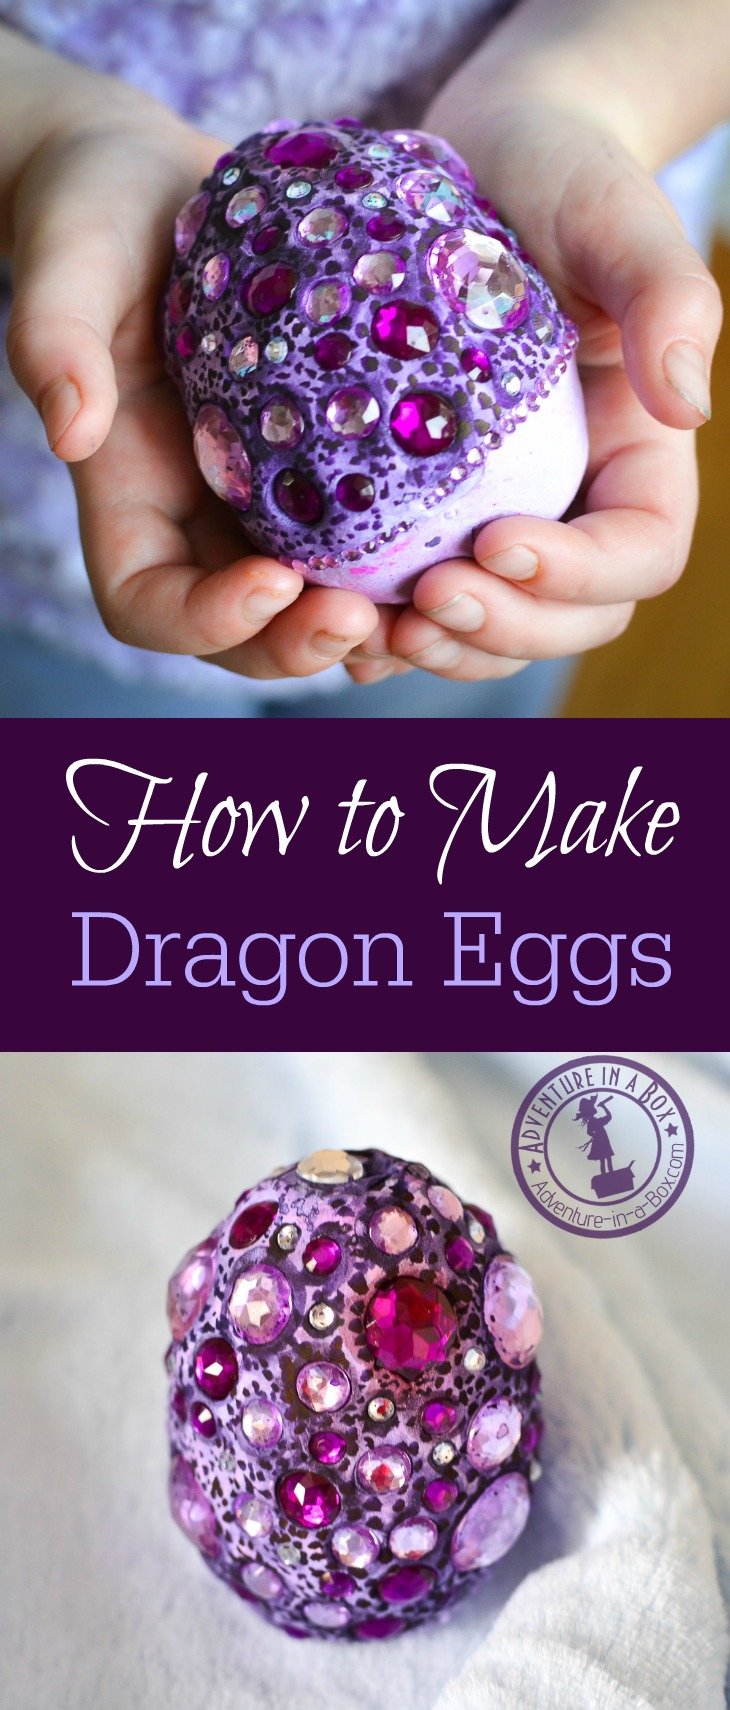
Step 4: Insert the Beads, Jewels, Etc.

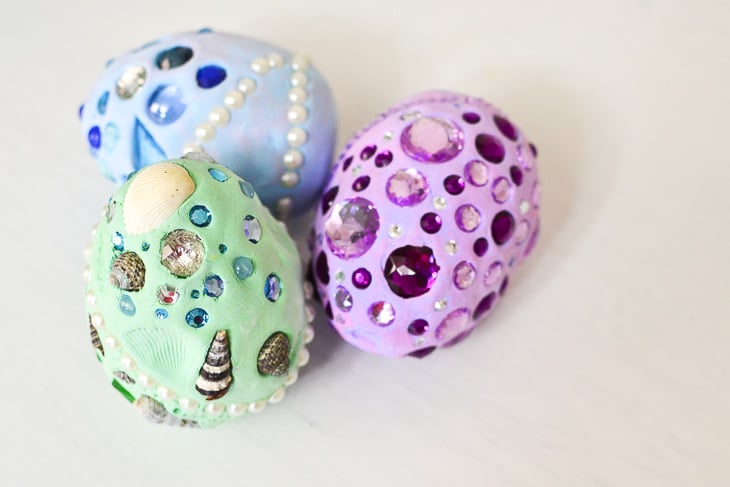
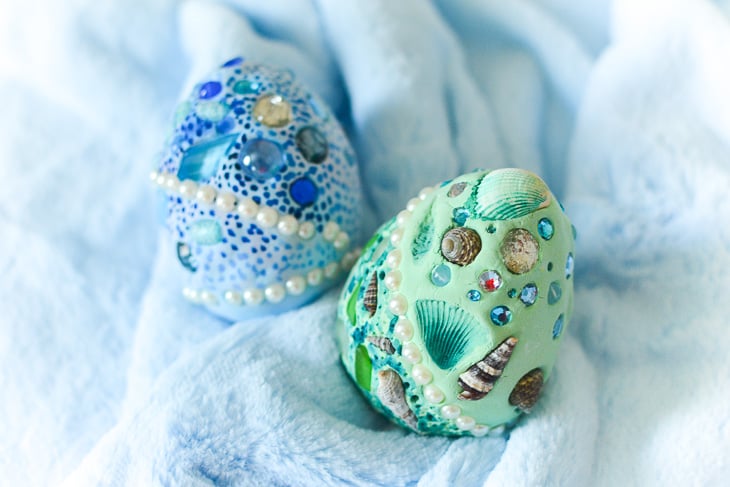
Collect beads, jewels, seashells and other pieces you lot're going to employ for decorating. Also acrylic beads, we used beach drinking glass and seashells. After all, at that place can be different kind of fantasy creatures with eggs – a sea dragon or a mermaid. Strings of simulated pearls also worked well for our eggs.
If you push beads and seashells deep enough into clay, it will stick and stay until the clay dries up. My son was three when nosotros made the eggs, and he didn't accept a problem with jamming those stones correct in.
When information technology came to making eggs with seashells, some of them were as well big to stick. No problem – we used them equally stamps instead, and added some texture to the clay.
Step five: Let the Eggs Dry out.
Usually 24 hours is plenty. If you forget yours for longer, information technology isn't a problem. They can be done at this point. This is how ours turned out.
Footstep vi (Optional): Accentuate Texture with More Paint
As I mentioned in the offset, you tin besides work with clay as it came out of the bag and add together colour in the end. We stained our dirt, but wanted to add together more texture with watercolours. We tried different brush strokes, simply my favourite was the texture created by dabbing the clay surface with the tip of the brush to create a uneven polka-dot expect.
Not sure what chance we have at hatching a dragon, simply we have done our best at creating convincing eggs!
Want a card with elementary instructions for when y'all brand the craft? You tin impress the one below!
Materials
- aluminum foil
- air-dry out clay
- liquid watercolours or food colouring
- acrylic beads, jewels and stones; seashells, beach glass and rocks; anything else that might embellish a dragon's egg
Instructions
- (Optional) If yous are using a coloured clay, skip to step ii. If you are using a white clay, yous may desire to stain it by mixing with liquid watercolours or food colouring.
- Roll aluminum foil into a brawl/egg.
- Embrace the aluminum ball with clay and sculpt it into an egg class.
- Decorate with beads, jewels, and seashells by pushing them into clay.
- Let the eggs dry for about 24 hours.
- (Optional) At this bespeak, you tin pigment them once again.
If you make dragon eggs, please, share your pictures with united states on our Instagram or Facebook pages!
More dragons?
If yous take a fondness for dragons, check our other dragon crafts!
Articulated Dragon Puppet
Dragon & Princess: free printable bill of fare, colouring page & art prompt
Dragon Clothespin Puppet

More than Eggs?
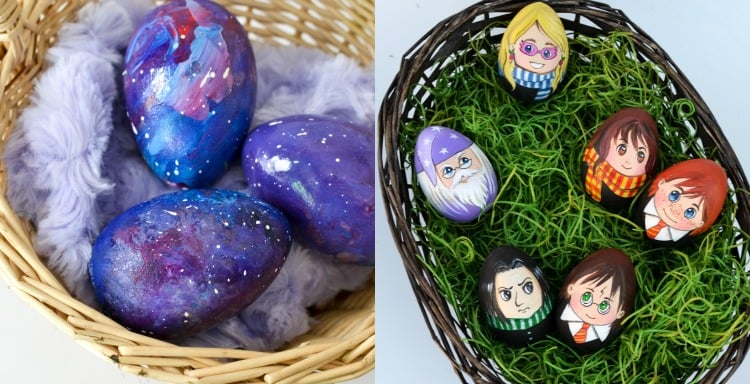
I beloved painting eggs! Nosotros fabricated these dragon eggs together with my son when he was iii, so I recommend it as a very like shooting fish in a barrel and child-friendly arts and crafts. When he was 2, nosotros made space eggs. And Harry Potter eggs were only i of my favourites. Plus, they continue well with the dragon theme.
Thanks for reading and come again!

Source: https://www.adventure-in-a-box.com/how-to-make-fantasy-dragon-eggs/
Posted by: spiveystootherents.blogspot.com
0 Response to "How To Draw Detailed Dragon Eggs Not Hatched"
Post a Comment